Copyright James A. Storer 2009; U.S. patent 8,393,623 March 2013.
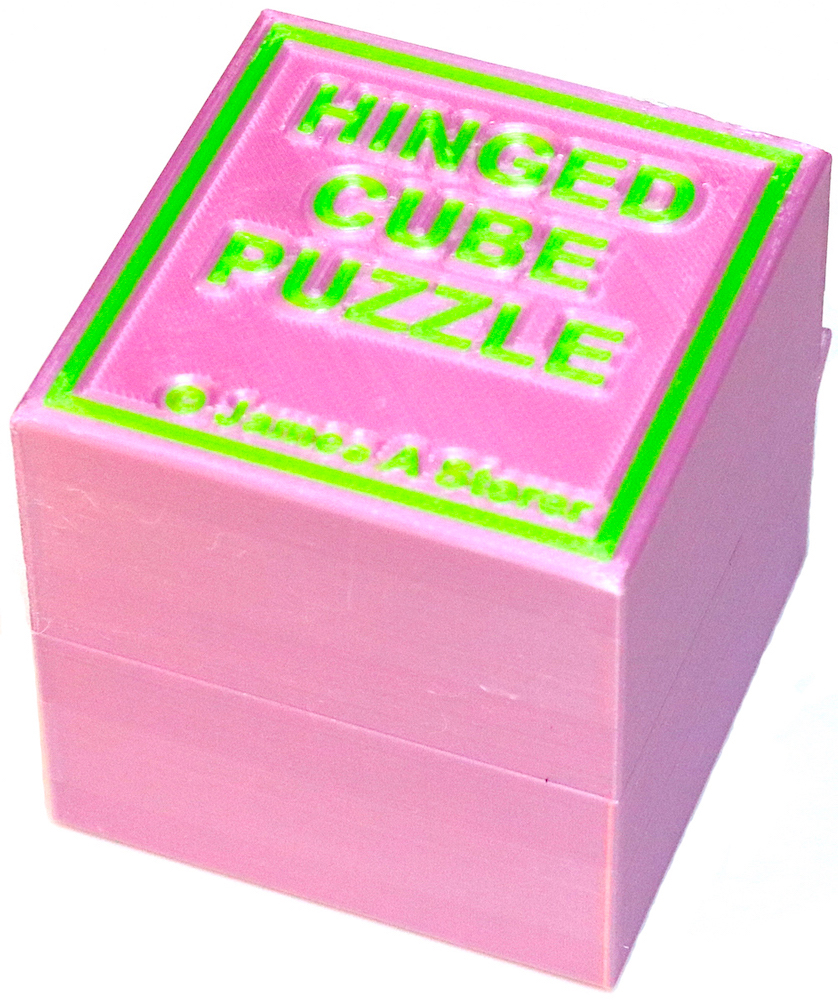
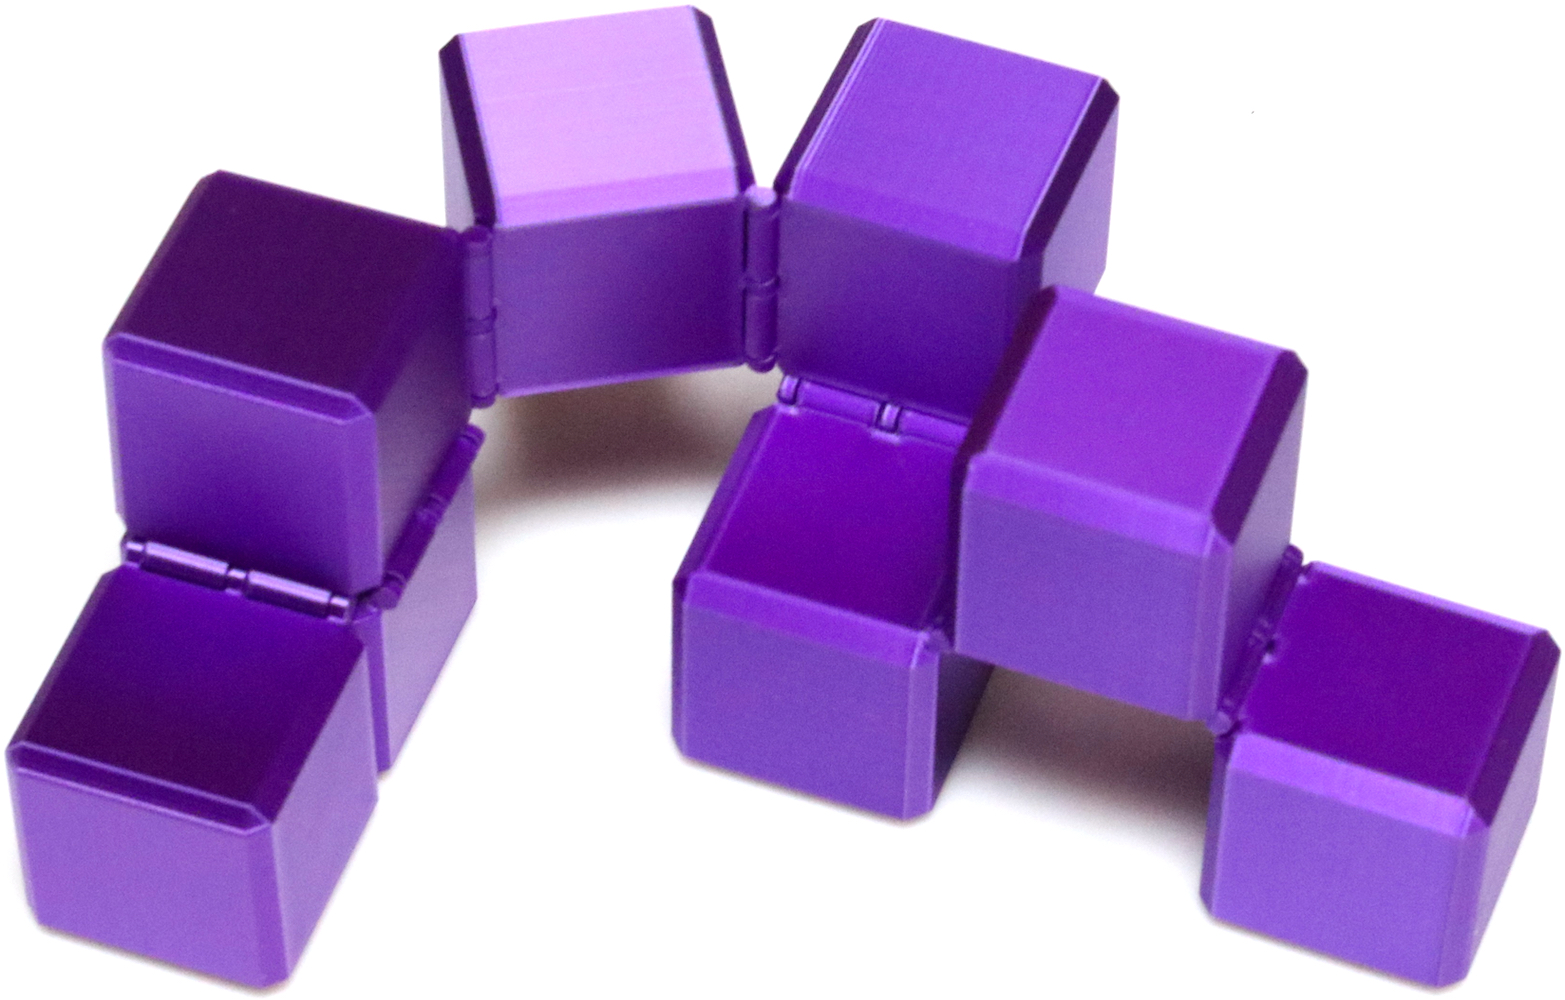
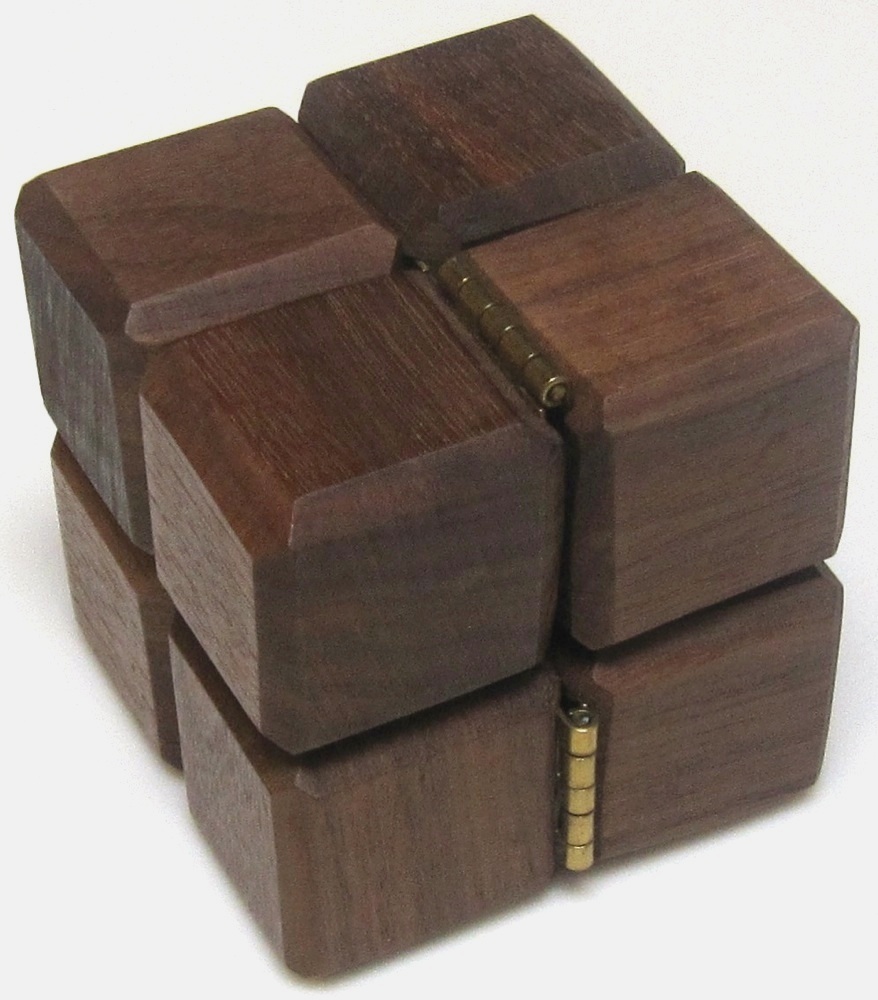
(Kingwood with brass hinges, 2.25 inches square assembled)
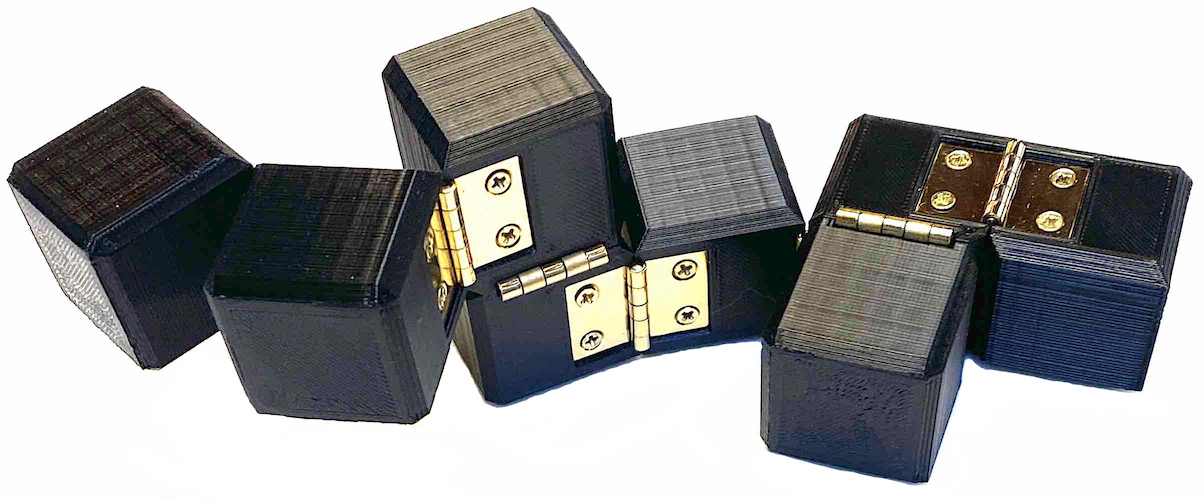
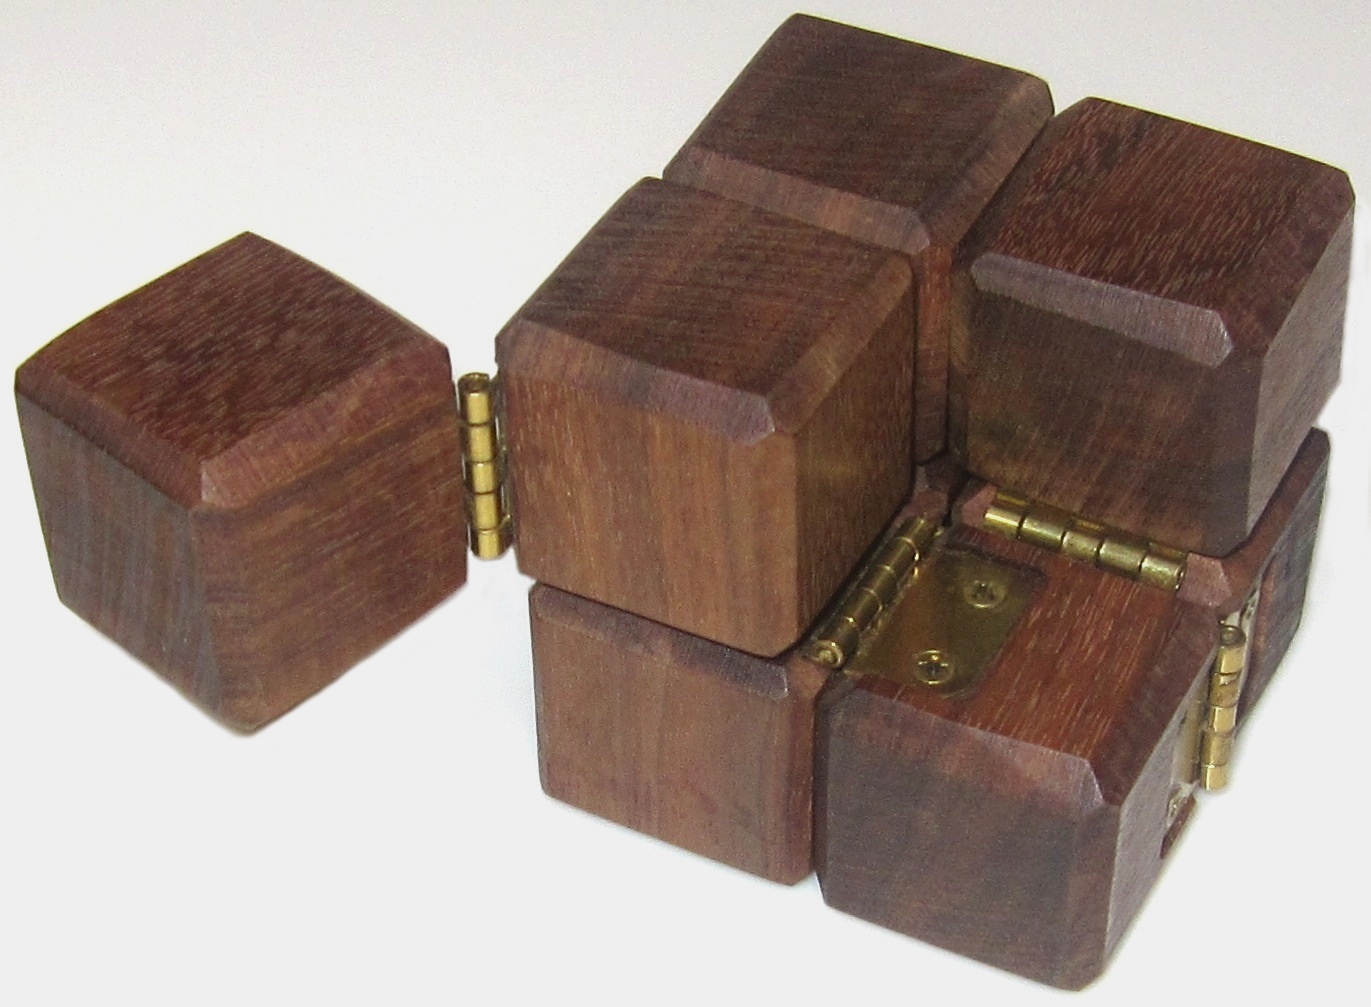
Fold the eight cubes into a larger 2x2x2 cube; there are seven hinges:
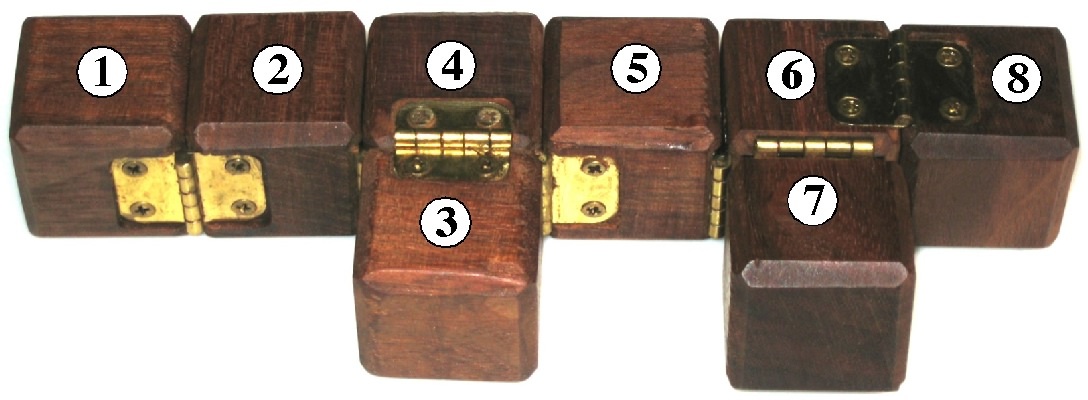
Hinge 1 joins cube 2 to cube 1, on the front faces.
Hinge 2 joins cube 3 to cube 2, on the back face of 3 and the right face of 2.
Hinge 3 joins cube 4 to cube 3, on the top faces.
Hinge 4 joins cube 5 to cube 4, on the front faces.
Hinge 5 joins cube 6 to cube 5, on the left face of 6 and the right face of 5.
Hinge 6 joins cube 7 to cube 6, on the back face of 7 and the front face of 6.
Hinge 7 joins cube 8 to cube 6, on the top faces.
Fun but not too hard; people often spend 30 minutes or so to solve. Solid hinges suggest folding one cube at a time, which can lead to a position like the one shown on the right above.
Construction has four types of hinge cutouts:
Type A: Cube 1,7,8: Top-RightThe types can be arranged in this order and then rotated appropriately to attach hinges:
Type B: Cube 2,5: Top-Right, Left-Up
Type C: Cube 3,4: Top-Right, Back-Up
Type D: Cube 6: Top-Right, Front-Up, Left-Right
1 2 3 4 5 6 7 8
A B C C B D A A