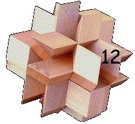
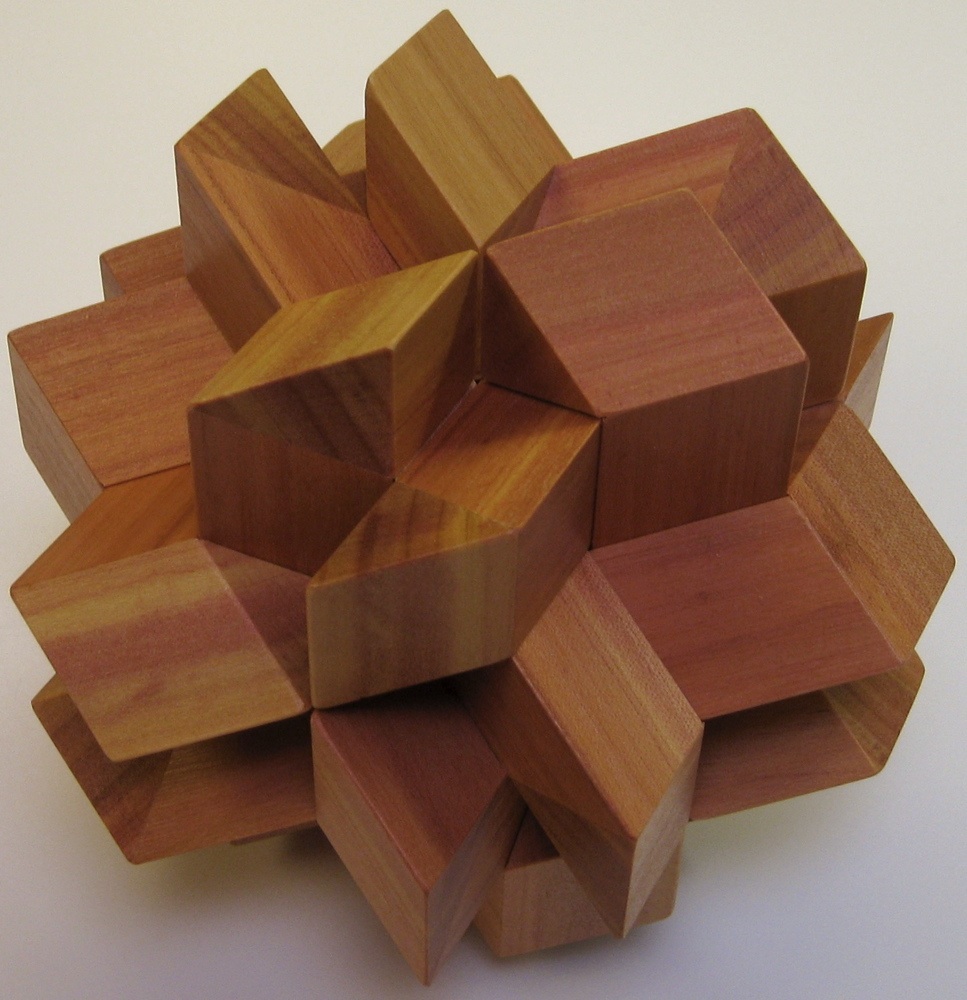
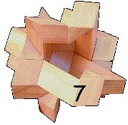
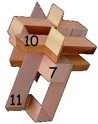
Twelve Piece Separation

Designed by Stewart Coffin, made by interlocking puzzles 2002.
(Peroba Rosa, 12 pieces, 5 inches)
In
Geometric Puzzle Design,
Stewart Coffin says:
"Twelve sticks of triangular cross-section with pyramidal end blocks assemble with some difficulty to form a symmetrical interlocking burr."
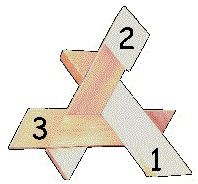
Here is the solution that was sold with the puzzle
(pieces are numbered in assembly order):
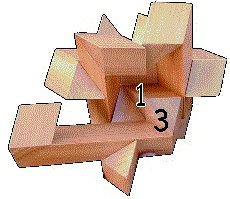
Step 1:
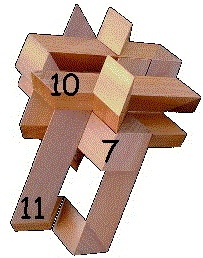
Assemble pieces #1, #2, and #3 to form a triangular base.

Step 2:
When in place piece #4 will stand vertically with piece #5 parallel to piece #3.
Piece #5 is the only piece with an extra augmentation.
Assemble with the augmentation directly to the left of piece #2.
Hold #4 loosely to allow #5 to slide in under the hook of #2.
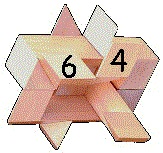
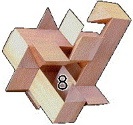
Step 3:
When in place piece #6 will be parallel to #4.
To assemble, piece #6 hooks around #2 from below and slides up through next to #4.

Twelve Piece Separation Solution Continued
Step 4:
When in place piece #7 will be parallel to piece #1.
To assemble, first push piece #1 all the way into the puzzle.
This allows piece #3 to move to the left giving room for piece #7.
Step 5:
Insert piece #7.
Slide piece #3 back to the right and #1 forward.
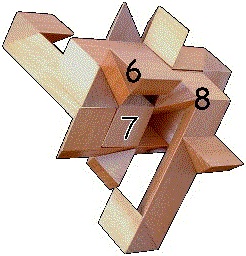
Step 6:
When in place piece #8 will be parallel to piece #2.
To assemble, place #8 on the right side by hooking around #4 and sliding through #1.
Step 7:
Now the puzzle has enough pieces in place to hold together better.
When in place piece #9 will stand vertically, parallel to piece #4 and #6.
To assemble, drop #4 down and move piece #7 back away from you.
Bring #8 towards you until enough opening is made to allow for #9.
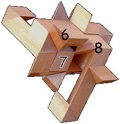
Twelve Piece Separation Solution Continued
Step 8:
Insert #9 by hooking around #3.
Push #8 back in place to allow #4 to come back up.
Make sure #9 is all the way down to allow #7 to slide back towards you.
Bring #9 up to its final place.
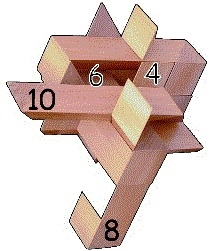
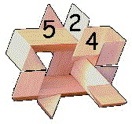
When in place piece #10 is parallel to #5 and #3.
To assemble, hook the end of #10 around #8 and slide left under #9.
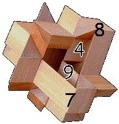
Step 9:
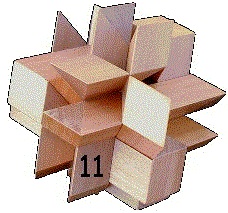
When in place piece #11 is parallel to #8 and #2.
To assemble, first drop #4 and #6 down.
Slide #8 all the way towards you.
Then move #10 to the left just enough.

Step 10:
This allows #11 to be inserted underneath #10 with its end hooking around #7.
Slide #10 back to the right. Now #8 slides back to allow #4 up.
Make sure #11 is all the way towards you to allow #6 to come back up.
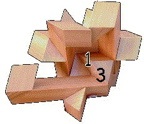
Steps 11 & 12:
Move #11 to its final place.
Then the key piece #12 moves in parallel to #7 to touch the augmented place on #5.